In this tutorial, we will create a simple App with DroidScript and the WiFi IDE.
The DroidScript WiFi IDE (Integrated Development Environment) runs in your web browser and gives you a code editor, plus documentation, sample and debug log views. From the WiFi IDE you can create, edit and run your DroidScript Apps.
Starting the WiFi IDE
If you haven't already, start DroidScript on your Android device. Before we can start the WiFi IDE, we must enable WiFi Connect.
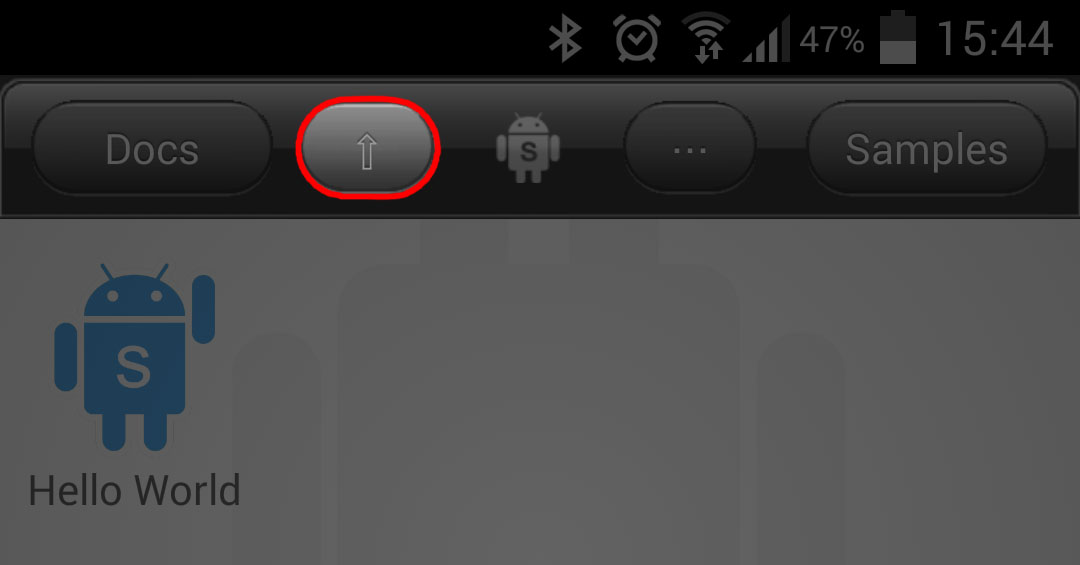
Press the WiFi Connect button on the DroidScript toolbar.
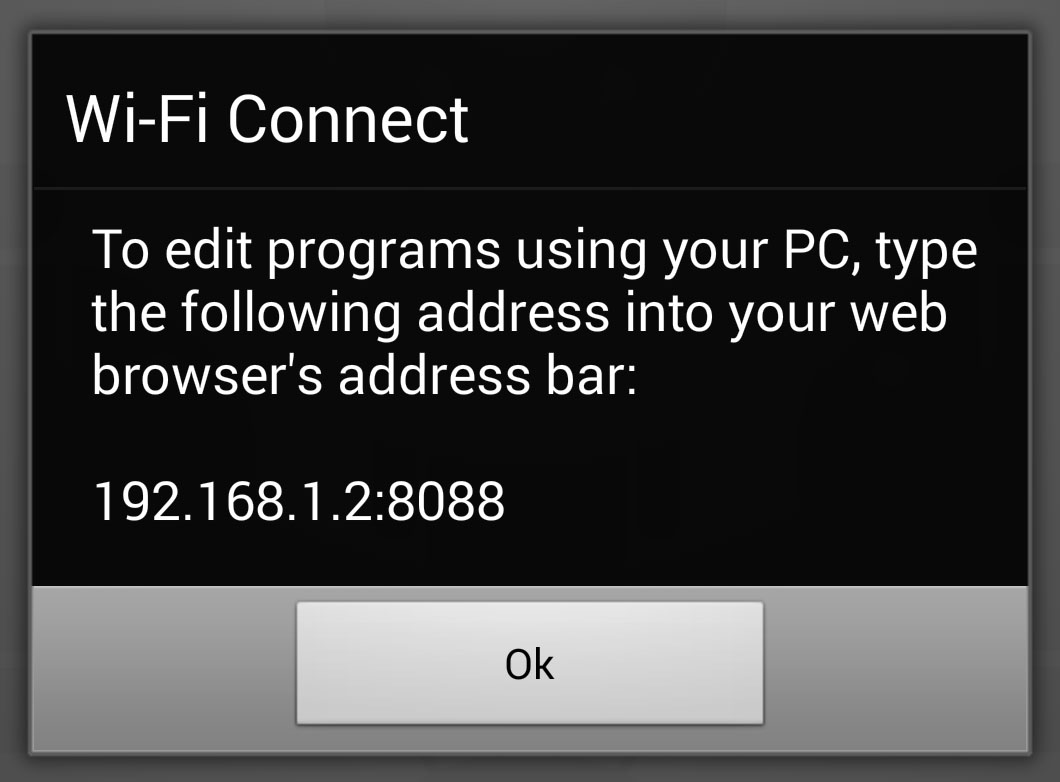
You will now see a popup window showing you an address to enter into your web browser's address bar.
When WiFi Connect is enabled, the arrow icon on the button turns green.
Now we have enabled WiFi Connect, start a web browser on your computer. In your web browser's address bar, enter the address you were shown when you enabled WiFi Connect and press enter.

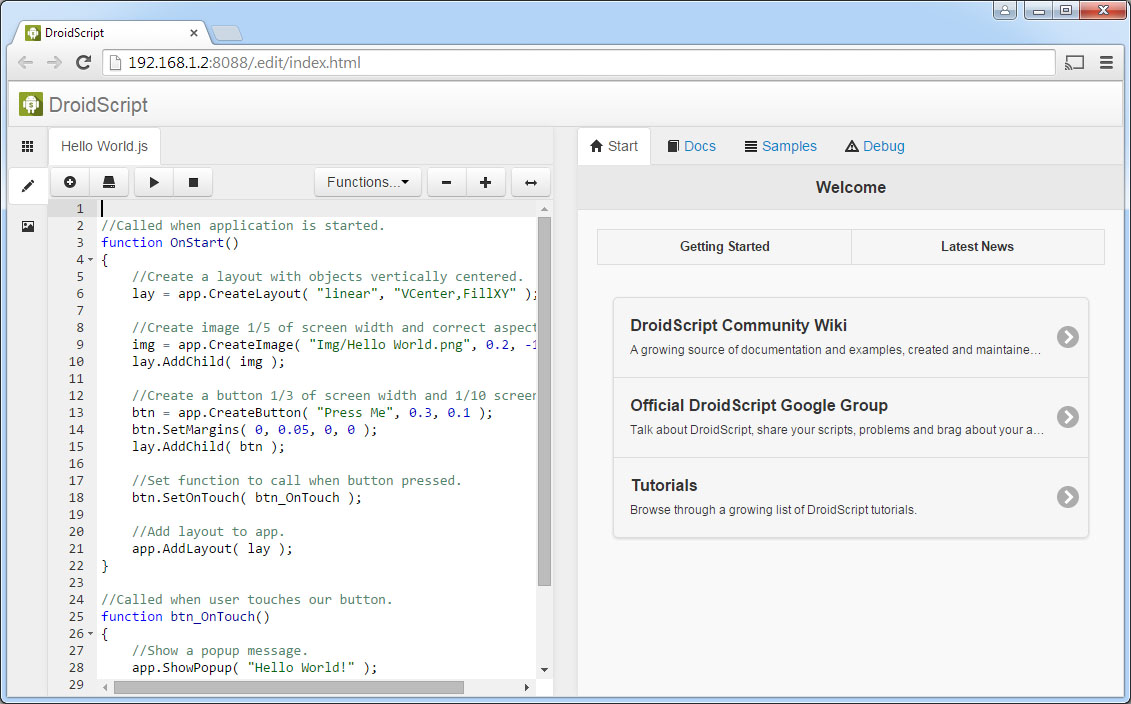
You should now see the WiFi IDE in your web browser, like this:
Creating a new JavaScript App
Now the WiFi IDE is running, let's create a new App. Make sure the Apps view is showing by clicking on the Apps  button.
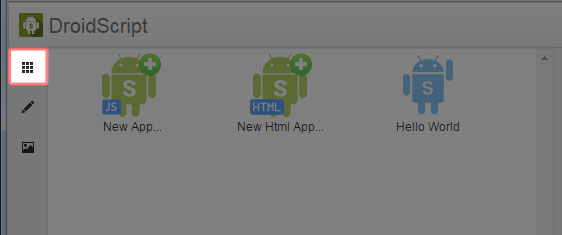
In the Apps view you can see all your DroidScript Apps, which you can open to edit by clicking on their icons. New Apps can be created by clicking on the New App... or New Html App... icons.
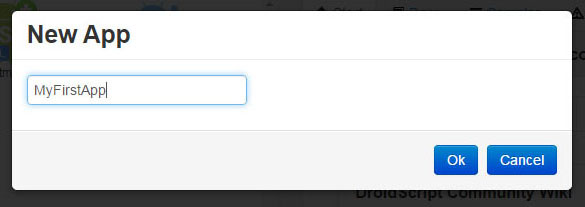
We are going to create a new JavaScript App (we will cover Html Apps in another tutorial). Click on the New App... icon, then enter a name for your App in the New App popup window and click Ok.
You should now see the Editor view on the left-hand side, showing the code for your new DroidScript App.
When you create new Apps, DroidScript will automatically generate the code for a simple App to help you get started. Let's run this App to see what it does.
Click the Run  button from the Editor view toolbar.
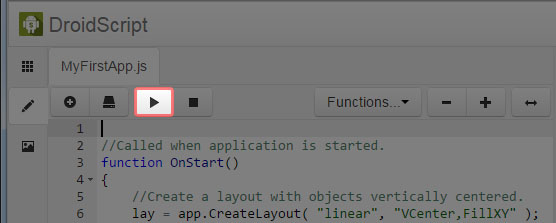
You should now see the App running on your Android device, which simply shows the text "Hello" in the center of the screen.
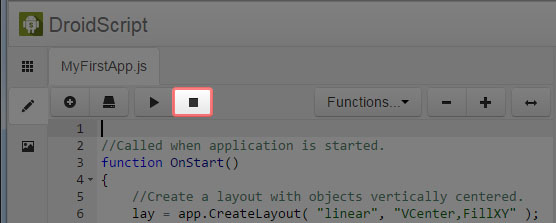
Stop the App by clicking the Stop  button from the Editor view toolbar.
Examining the Code
Let's now take a look at the code for the App we just created.
The OnStart function is the start point for DroidScript Apps, and is called automatically when your App is run.
The first line of code in the OnStart function creates a new layout.
A layout is a container that is used to organize graphical objects (controls), such as text, buttons and images on the screen. The first parameter passed into the CreateLayout method sets the type of layout to create, in this case it is "linear".
A linear layout organizes controls either horizontally or vertically. By default, controls are stacked vertically.
The second parameter passed into the CreateLayout method can be used to set how controls are aligned inside the layout, and how the layout itself sizes inside its parent.
In our code, "VCenter" says that controls should be centered vertically inside the layout. "FillXY" says that the layout should fill its parent, and since this is the one and only layout of the App, it will fill the screen.
Before a layout and its child controls can be displayed on the screen, it must be added to the App using the AddLayout method.
Controls, such as text, images and buttons, can be added to layouts. The following lines of code from the OnStart function will create a new text control.
txt.SetTextSize( 32 );
The text control will display the word "Hello". We can change the size of the text by using the SetTextSize method, in this case it is set to 32.
The text control must now be added to the layout using the AddChild method.
That's it! We've now looked at all the code in our App. Try running it again, you can see the text control showing the word "Hello" vertically centered on the screen.